Postman Testing for Beginners

Software testing is an important part of the software development lifecycle. It's the process of ensuring the quality, reliability, and security of your software products. It helps uncover bugs and inconsistencies early on, preventing costly post-deployment fixes, and helps ensure a smooth experience for your users. API (Application Programming Interface) testing is a type of software testing that involves verifying and validating APIs. This is crucial because APIs are the backbone of most modern web and mobile applications.
In this tutorial, you will learn how to test your APIs using Postman. Postman is an API management platform for designing, documenting, testing, mocking, monitoring and collaborating around API. This post will cover how to write tests for your APIs in Postman and is part of a series covering how to work with APIs.
What is API Testing?
- Functional Testing: Ensuring the API behaves as expected.
- Reliability Testing: Making sure the API can be consistently connected to and lead to consistent results.
- Load Testing: Checking how the API handles a large number of requests.
- Security Testing: Ensuring that the API has robust security measures, such as authentication and data encryption.
- Data Accuracy Testing: Verifying that the data returned by the API is accurate.
- Health Checks: Periodic checks to ensure APIs are up and running as expected.
Understanding Postman's Testing Language
Postman uses JavaScript for scripting tests, making it a powerful tool for developers familiar with the language. Postman leverages Chai.js, a popular BDD/TDD assertion library for Node.js and the browser. Chai.js provides developers with a range of expressive language constructs to write readable and maintainable tests. To delve deeper into Chai.js and its various capabilities, you can explore Chai.js Documentation.
At the heart of Postman's scripting capabilities lies the pm object. This object is a gateway to a multitude of functionalities in Postman, ranging from sending requests to accessing test results and environment variables.
Key Methods and Properties of the pm Object:
- pm.test(name, function): Used to define a test.
- pm.response: Gives access to the response data (like
pm.response.json()for JSON responses). - pm.request: Provides information about the request sent.
- pm.variables: Allows getting and setting variables in scripts.
- pm.environment: To access and manipulate environment variables.
- pm.expect(): The assertion method, derived from Chai.js, for writing test conditions.
Below, I will run down how to use these different methods and properties in our tests.
Writing Basic Tests in Postman
1. Starting with pm.test()
Basics of Defining a Test
pm.test()is your starting point for any test in Postman. Here, you give your test a name and define the function that will contain your test logic.
Below is an example test checking that our response code is 200
pm.test("Status code is 200", function () {
    // write your code here to test the API
    pm.response.to.have.status(200);
});
2. Exploring pm.response
Accessing Response Data
- Use
pm.responseto dive into the details of the API response, such as the body, status, and headers.
Below is an example test to verify a specific string ("success") in the response
pm.test("Body contains 'success'", function () {
    var responseBody = pm.response.text();
    // write code to use the responseBody
    pm.expect(responseBody).to.include("success");
});
3. Using pm.expect()
Writing Assertions
pm.expect()is a powerful assertion tool from Chai.js that you use to check whether certain conditions are met in your tests.
Here is a test script using the expect syntax to check for specific keys in the response body
pm.test("Body contains 'success'", function () {
    var responseBody = pm.response.text();
    // write code to use the responseBody
    pm.expect(responseBody).to.include("success");
});
Here is a test script using the expect syntax to test if the response time is within a set limit.
pm.test("Body contains 'success'", function () {
    var responseBody = pm.response.text();
    // write code to use the responseBody
    pm.expect(responseBody).to.include("success");
});
4. Leveraging pm.variables and pm.environment
Variable Management
pm.variablesis a powerful feature in Postman that allows you to access and manipulate variables within your test scripts. These variables can be used to store and retrieve data dynamically, making your tests more flexible and maintainable. You can usepm.variables.get("variableName")to retrieve the value of a variable. To set a new value or update an existing one, usepm.variables.set("variableName", "newValue")pm.environmentspecifically deals with environment variables in Postman. These are key-value pairs that you can define in different environments, like testing, staging, or production. Environment variables are useful for storing data that changes based on the environment you are working in, such as API endpoints, credentials, or any other contextual data. Similar topm.variables, you can usepm.environment.get("variableName")to get an environment variable's value andpm.environment.set("variableName", "newValue")to set or update a value.
Below is a test script that checks that the access token is provided with a login response and then set as an environment variable for use with successive requests:
pm.test("Extract and set access token", function () {
    var responseData = pm.response.json(); // Parsing the JSON response
    var accessToken = responseData.token;   // Extracting the token

    // Check if the token exists and is not empty
    pm.expect(accessToken).to.be.a('string').and.not.empty;

    // Setting the token as an environment variable
    pm.environment.set("access_token", accessToken);
});
5. Inspecting pm.request
Request Details
pm.requesthelps you examine the specifics of the request sent, like headers and body.
Below is a test script checking the 'Content-Type' header of the request and making sure it is application/json.
pm.test("Content-Type header is correct", function () {
    var contentType = pm.request.headers.get('Content-Type');
    pm.expect(contentType).to.equal('application/json');
});
Putting It All Together: Writing a Comprehensive Test
Now that we've explored the key components let's put them together in a comprehensive test script. This script tests a fictitious user fetch API, it will do the following:
- Status Code Check: Ensuring the response status is 200.
- Response Time Check: Verifying the response time is within an acceptable limit.
- Content-Type Header Validation: Checking if the response header has 'Content-Type' as 'application/json'.
- JSON Body Validation: Make sure the response body is in the correct JSON format and contains expected data.
- Data Integrity Test: Verifying specific fields in the JSON response contain the correct data types and values.
- Dynamic Data Test: Using an environment variable to validate a part of the response.
Comprehensive Test Script
pm.test("Comprehensive User Data API Test", function () {
    // Status Code Check
    pm.response.to.have.status(200);

    // Response Time Check
    pm.expect(pm.response.responseTime).to.be.below(1000); // expecting response within 1 second

    // Content-Type Header Validation
    var contentType = pm.request.headers.get('Content-Type');
    pm.expect(contentType).to.equal('application/json');

    // JSON Body Validation
    var jsonData = pm.response.json();
    pm.expect(jsonData).to.have.all.keys("id", "name", "email", "age");

    // Data Integrity Test
     pm.expect(jsonData.email).to.match(/^[\w-\.]+@([\w-]+\.)+[\w-]{2,4}$/); // Email format validation
    pm.expect(jsonData.age).to.be.a('number'); // Age should be a number
    pm.expect(jsonData.name).to.be.a('string');

    // Dynamic Data Test
    var userId = pm.environment.get("user_id");
    pm.expect(jsonData.id).to.equal(userId);
});
In this script, we've combined various testing aspects into one pm.test() function. Each line of the test targets a different aspect of the API response, giving you a thorough check of your API's performance and reliability.
Using PostBot for AI Productivity Gains
Postman's Postbot is a feature designed to simplify and expedite the process of writing tests. It provides a set of pre-written test snippets that you can easily add to your test scripts. What makes it stand out, however, are its AI capabilities. Using Postbot, you can simply describe the tests you need in natural language, and the AI will generate it for you. Whether you're looking to verify response statuses, check response times, or validate JSON structures, Postbot's AI can interpret your requirements and create appropriate test scripts.
How to Use Postbot for AI-Driven Test Creation
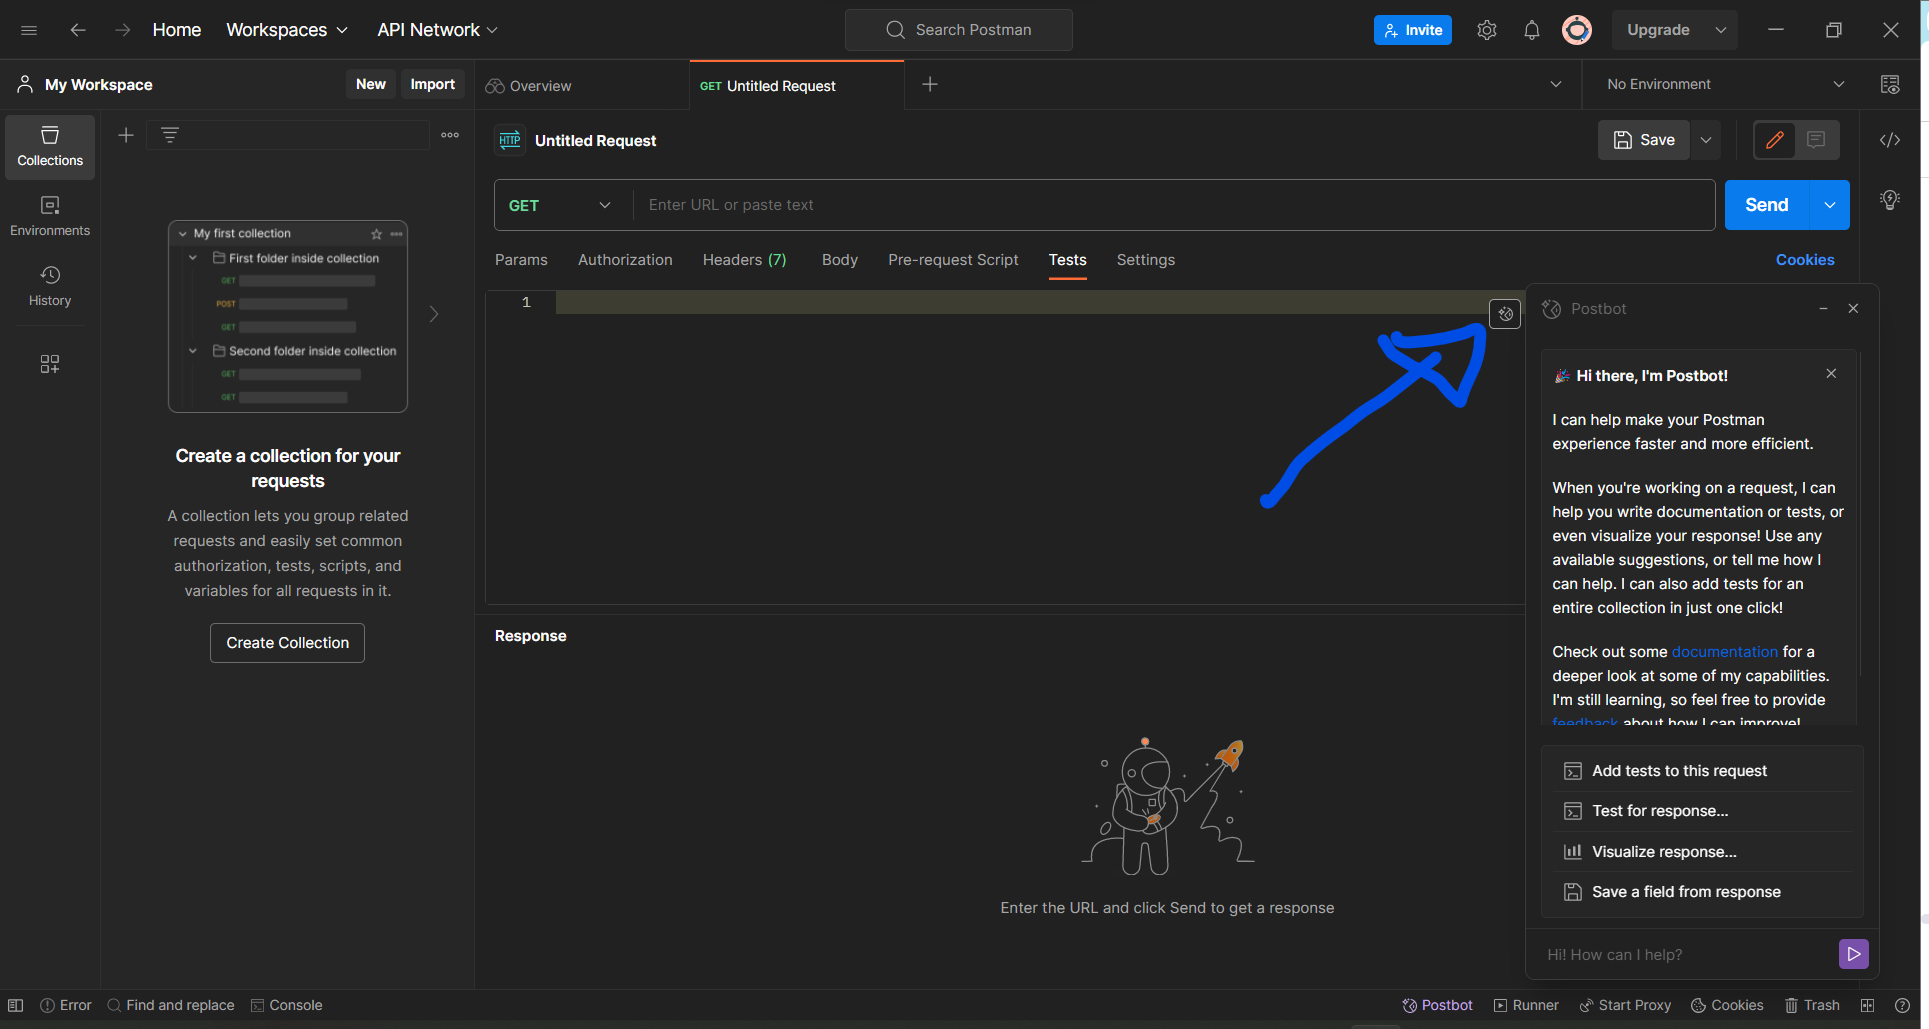
- Access Postbot: In the "Tests" tab in Postman, you'll find the Postbot icon. Clicking on it opens a chat-like interface.
- Describe Your Test: Simply type in a description of what you want to test in plain English. For example, "Check if the response status is 200" or "Verify that the response contains a user ID".
- Receive Test Scripts: Postbot's AI interprets your description and generates the corresponding test script. You can then review and add this automatically generated script to your collection.
Postbot significantly reduces the time and effort required to write test scripts. Its AI-driven approach is particularly beneficial for those new to API testing or JavaScript, offering an intuitive way to create complex tests.
Conclusion
In the fast-paced world of API development, ensuring the reliability and performance of your digital offerings is paramount. Through this article, you've learned more about Postman, exploring its robust testing capabilities, from the foundational pm methods to the advanced, AI-powered features of Postbot. We've seen how Postman transforms the often-complex task of API testing into a more approachable and manageable process.
To learn more about Postman Testing, you can read their extensive documentation, as well as go over the Chai.Js reference guide. You can also subscribe to this publication as I will be posting more content exploring different Postman features and how to use them to best manage your APIs.